Independent comparisons. We may earn from shop links. More info

How to use your pyrography pen: first burns on scrap

Updated: 21 October 2026

The parcel arrives and the first instinct is to trace the printed design immediately. Most rough first burns come from skipping setup: the wrong heat for the board, pressure instead of speed, or a tip that never fully cleaned after the factory. This guide walks a first session on scrap, then outlines, shading, grain and cleaning. For fumes and the desk layout, read [pyrography pen safety](/hub/soldering-and-welding/pyrography-pen/sub/pyrography-pen-safety) before you switch on. Which tool you own stays on the [pyrography pen comparison](/hub/soldering-and-welding/pyrography-pen). Nothing here is a lab burn test.

The parcel arrives and the first instinct is to trace the printed design immediately.

Our top picks

On this page

Before you switch on

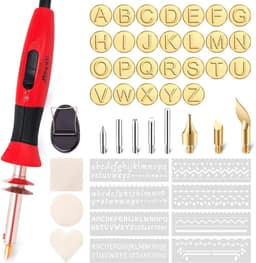
Clear a heat-proof zone. Put the pen stand where you can reach it, and route the cable so you will not snag the hot tip when you stand up. Open a window, or use air that extracts away from you, if you burn for more than a few minutes. Smoke is normal on wood, and UK reviewers on budget kits mention odour quickly indoors. Keep a damp sponge or a brass brush by the stand for tip cleaning, plus pliers if the kit uses wire nibs. Mount the pen in the stand and start at low-to-mid heat. On a dial station that means below halfway, then raise slowly. On a two-step kit, use the lower power for softwood trials. If the tool only glows red at the top of the dial, back off. Peter Child's workshop guidance treats a dull red as enough for most lines, and charring often means the heat or the dwell is too high. Transfer the design with graphite, carbon paper or a light pencil. Leave painted or unknown reclaimed wood alone.

Test strokes on scrap

Burn a straight line across scrap at your starting heat, moving steadily without pressing down. If the line skips, raise the heat slightly or slow your hand. If the wood blackens in one spot, lower the heat or speed up. Wire-nib pens respond quickly. Thick solid tips may need a few seconds after they touch the wood before the line darkens evenly. Practise dots, curves and cross-hatching in a corner. Note which dial position gives a light tan and which gives a deep brown. Rest the pen in the stand whenever you pause. A hot tip left on wood burns through the grain in seconds. If the buying guide choice has only two power steps, treat the lower step as sketch and the higher step as fill.

Outlines and shading

Trace outlines with a fine tip or a tight wire loop. Let the tool travel with the grain rather than forcing sideways pressure. Blobs at corners usually mean you paused too long with the heat still on. Lift slightly before a turn, or reduce heat for a tight curve. Shading is layers, not one heavy pass. Build tone with parallel strokes or small circles, and wait until the surface will take another pass without turning to charcoal. On an adjustable station, many UK artists drop the heat a notch for the second layer instead of pressing harder. Solid-tip shaders need slower passes. Wire-nib shaders can feather lightly if the heat is stable. Work from background to foreground so a smudge does not ruin a finished line. Erase stray pencil before you burn over it. Graphite can darken unpredictably under heat.

Grain and direction

Wood fights you when you burn against the grain. The tip catches and jumps. Read the grain on the blank and plan long strokes so the pen travels with the fibres. Short cross-grain hatching is fine if the heat is moderate. Hardwoods need lower heat or a faster hand than soft pine, which scorches easily. Knots and resin pockets flare dark. Route the outline around them, or sand lightly afterwards. MDF squares in some kits burn evenly and feel different from timber.

Cleaning, storage and the next board

Carbon builds on every tip and acts like insulation. A dirty tip runs cooler and the tone goes uneven. Wipe on a damp sponge between sections, or use an aluminium oxide block on a solid point once the tip is warm, not glowing. Let wire nibs cool before you bend or swap them, and tighten the screws if the listing warns about loose nibs. Unplug when you finish and let the pen cool fully before you pack it away. Coil the cable loosely. A tight wrap stresses the entry next to the hot section. Store tips in the tin so wire loops do not bend. If the burn stays patchy after cleaning, the tool may be a soldering-iron-style kit with slow recovery. That is a product choice on the main table, not a technique fix on its own. On a gift piece, repeat the test stroke on an offcut of the same species. Humidity in a UK kitchen or shed changes how fast wood scorches, so a winter dial setting can run hot after rain.

Common questions

What temperature should I start at?
Start mid-low on the dial and raise it in small steps on scrap until the lines are clean without char. On a two-step kit, use the lower power for the first lines on softwood.
How do I avoid blobs at the ends of lines?
Ease off before you stop, or lift while you are still moving. Lower heat helps on tight corners. A pause with the tip down is what leaves the blob.
Should I press hard?
No. Let heat and speed do the work. Pressure bends wire nibs and stalls a solid tip, so the line goes patchy instead of darker.
How do I transfer a design?
Use a light pencil, a graphite rub, or carbon paper under a printed pattern. Keep the lines faint so they disappear under the burn.
How often should I clean the tip?
Every few minutes during shading, or whenever the tone lightens when you did not change the dial. Carbon insulates the tip and cools the burn.
Which wood should I practise on first?
Kit blanks or soft pine offcuts. Match the species to the final project once the strokes feel steady. A deep burn cannot be sanded out, so test the species first.

Related pages

Sources

Sources taken from the research digest. Listings were read from the stored amazon.co.uk display.

  1. Makers Nook: woodburning kits (retrieved 21.10.2026)
  2. Burn Savvy: wire-nib pyrography pen (retrieved 21.10.2026)
  3. Peter Child: technique and heat (retrieved 21.10.2026)
  4. Prima: pyrography starter tips (retrieved 21.10.2026)
  5. YIHUA 939-II on amazon.co.uk (retrieved 21.10.2026)
  6. HSE: electrical equipment (retrieved 21.10.2026)