Staples or pins for picture frames: what to use

Choose V-nails, brads, pins or staples for picture-frame joints, with guidance on moulding depth, glue and how to avoid splitting narrow timber.
On this page
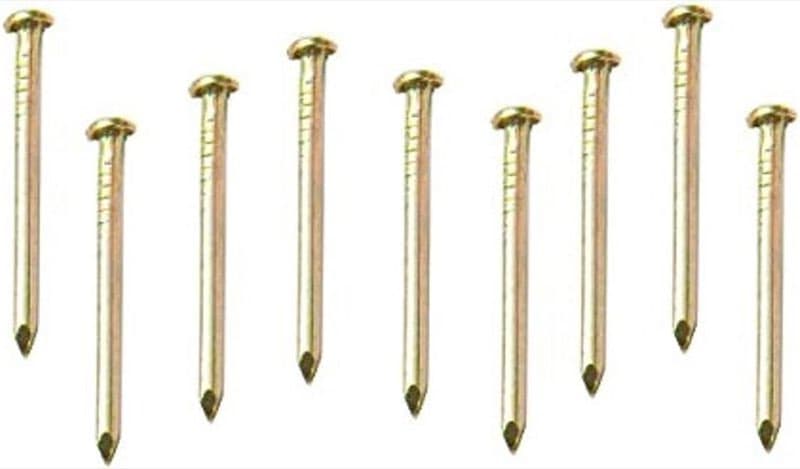
You have cut four clean mitres, brought the corners together and now need a fixing that will not burst through the decorated face. When choosing staples or pins for picture frames, the decisive point is where the fastener will go: V-nails are made to join the mitre from behind, while fine pins or brads are only conditional alternatives. Ordinary upholstery staples are useful elsewhere on a frame, but they are not a direct substitute for an underpinner.
In short
For a conventional timber picture-frame corner, glue the mitre and drive a suitable V-nail into the back with an underpinner. A small brad or 23-gauge pin can act as a temporary clamp on carefully chosen moulding, but a framing nailer is far too aggressive; reserve ordinary staples for backing and other non-mitre tasks.
The trade joint is a V-nail
A V-nail is the purpose-made fastener for joining the back of a mitred picture frame. An underpinner supports the moulding, brings the joint together and pushes the V-shaped fastener upwards into both halves of the corner. The visible face stays free of nail heads, and the fastener is positioned to pull the two cut surfaces together rather than simply crossing one piece of timber.
The glue still creates the main bond. The V-nail maintains alignment and pressure while the adhesive cures, which is why a dry corner that appears firmly pinned can still open later. On wider moulding, a framer may use more than one V-nail, but the profile must have enough sound timber to accept them. Decorative hollows, rebates and thin outer lips reduce the usable depth even if the moulding looks substantial from the front.
V-nails are also selected for the material. UK frame suppliers distinguish fasteners intended for softer timber from those intended for hardwood; the wrong choice can fold badly, resist entry or split the moulding. If you are buying equipment for repeated frame-making, an underpinner and the correct V-nails give you more control than adapting a general-purpose nail gun. For occasional work, a manual underpinner may be slower, but it still applies the fastener in the correct place and direction.
How to choose the V-nail length
Choose length from the actual timber beneath the insertion point, not from the tallest part of the decorative profile. UK framing guidance uses roughly two-thirds to three-quarters of the moulding depth as a starting point, while supplier advice often says to leave about 5 mm of material beneath the front face. These are practical workshop rules, not guarantees: a profiled moulding may be much shallower at the intended fixing point than it is at the back edge.
Measure where the V-nail will enter and check the front for slopes and thin lips. A shorter fastener that stays buried is safer than risking a point showing through. Test on an offcut, keep clear of the outer edge and the glazing rebate, and choose a different V-nail spec rather than forcing a brittle hardwood.
When a brad or pin can work
An 18-gauge brad can be acceptable as clamping assistance on some home-made frames, especially when the moulding is plain, thick enough and made from forgiving softwood. It leaves a neater hole than a larger finish nail, but it still enters as a straight fastener and does not reproduce the drawing action of a V-nail. The corner must be glued, accurately aligned and supported before you fire. If the brad is expected to pull a gapped mitre closed by itself, the joint preparation needs correcting first.
A 23-gauge pin creates a still smaller entry mark. That makes it attractive where appearance matters, but the reduced diameter also means less holding power. Think of a pin as an unobtrusive way to stop a light assembly moving while the glue cures, not as proof that the joint is structurally complete. You can review tools for very fine fixings on the picture-nail comparison, but always confirm the fastener lengths the particular tool accepts.
Run a trial on an offcut from the same moulding, matching pressure, length, angle and edge distance. Wear eye protection and isolate the tool before clearing a jam.
Why a framing nailer is the wrong gun
Despite its name, a framing nailer is for building frames, not picture frames. It is a first-fix tool made to drive large nails into structural timber for work such as stud walls or roof components. A picture-frame mitre is small, close to a finished face and often cut from narrow or brittle moulding. Applying first-fix impact and a large shank to that corner invites splitting, surface damage and sudden movement out of alignment.
A finish or brad nailer can still be too coarse for delicate moulding if length, nose shape or power are wrong. Compare intended work and fastener range, not the word nailer on the box.
If you already own a larger nailer, buying smaller nails for it does not necessarily solve the problem; tools accept defined collations, angles, gauges and length ranges. Never load an unofficial substitute or defeat the contact safety to reach a tight corner. For an overview of heavier fasteners, the steel-nails comparison shows the broader category, but picture-frame work calls for the fine end of fastening or a dedicated underpinner.
Where staples belong on a picture frame
Fine-wire staples belong mainly at the back of a frame, where they may secure flexible backing or perform a specific assembly task for which the frame design allows. Type 71 and Type 80 staples are commonly associated with upholstery applications; they are not V-nails and should not be treated as though the series names describe frame-joining fasteners. A rectangular crown and two straight legs load the timber differently from a V-shaped underpinner fastener.
Firing a staple across a mitre can split thin moulding, push the pieces apart or leave a proud crown that interferes with backing. A bench-tight joint may still fail once glazing weight and seasonal movement apply.
Staples can still be the correct choice for a separate job. If you are attaching fabric to a display frame or fixing a suitable backing to a robust support, match the staple series and leg length to the gun and material. The air-stapler comparison helps with pneumatic models, but it does not turn an upholstery stapler into an underpinner. Keep the decision tied to the part you are fastening: corner joint, backing and wall hanging are three different tasks.
A practical way to join a frame at home
Start by dry-fitting all four mitres on a flat surface. If a corner shows daylight, recut or refine it before adding a fastener; metal cannot compensate for inaccurate angles without pulling the frame out of square. Check both diagonals after arranging the rectangle. Equal diagonal measurements indicate a square assembly, although twisted moulding can still prevent the faces from sitting level.
Apply a thin, even film of suitable wood adhesive to both mating surfaces, avoiding so much that it floods the decorated front. Bring the corner together in a mitre clamp or band clamp and remove squeeze-out according to the adhesive and finish instructions. With an underpinner, support the face properly and drive the selected V-nail from the back. With a fine brad or pin, use only a tested position that gives ample clearance from the front and edges.
Then leave the assembly clamped for the adhesive maker’s stated time. Grabbed is not the same as cured, and moving the frame early can create a hairline opening that the fastener conceals. Recheck square before the adhesive sets fully, because correcting a racked rectangle afterwards may mean separating and cleaning the joint. Add further corners in a controlled sequence rather than rushing around the frame.
Stop if the moulding fractures on the test piece, the fastener curls, the finish lifts or you cannot identify a safe insertion zone. Expensive, veneered, gesso-coated or unusually shaped moulding gives you little margin for experimentation; a framing workshop already equipped with an underpinner may cost less than replacing damaged lengths. The limit is the amount and type of timber available beneath the finished face.
Peter F. prepared this guide from UK frame-supplier joining guidance and UK nailer-category guidance. It is not a laboratory test. Product specifications can change, so confirm the moulding maker’s advice, the tool manual and the fastener compatibility before use. Qualifying purchases through retailer links may earn us a commission at no extra cost to you.
Common questions
Can I use a staple gun on a picture-frame mitre?
What is a V-nail for picture frames?
How long should a picture-frame V-nail be?
Can I use an 18-gauge brad for a picture frame?
Is a 23-gauge pin nailer suitable for frame moulding?
Can I use a framing nailer to make picture frames?
Do picture-frame corners still need glue?

Peter F. is the editor for DIY & tools at productscompared.co.uk. Comparisons in this category are checked against amazon.co.uk listings, review evidence and public UK sources.
Related articles

When a fine-wire stapler is the wrong tool
See where upholstery staples stop being suitable and when you need a different fastener.

Framing nailer or finish nailer
Compare first-fix and second-fix nailers before choosing a gun for lighter joinery.

Type 71 or Type 80 staples
Understand two common fine-wire staple series and why they are not interchangeable.