Independent comparisons. We may earn from shop links. More info

How to set a fence post without trapping water

Updated: October 2026

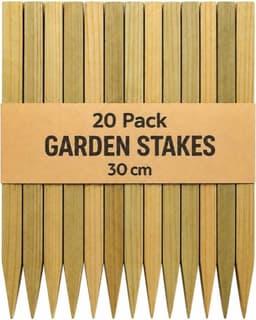
If you are working out how to set a fence post, check the timber before you open a bag of concrete. The post must be long enough for the intended fence and specified for ground contact; most pieces in our [wood post comparison](/hub/paints-and-varnishes/wood-post) are short pegs or stakes, not full-length fence posts. Once that is settled, the installation principle is straightforward: put the uncut treated end into a drained hole, keep concrete away from the underside and finish the concrete so rain runs away. This guide summarises UK timber-preservation and fencing guidance rather than a proprietary Postcrete method.

If you are working out how to set a fence post, check the timber before you open a bag of concrete.

Our top picks

On this page

Before you dig

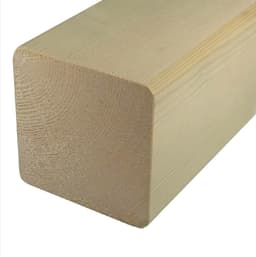
Mark the fence line, post centres and finished height, then check for buried electricity, gas, water, drainage and communications services. Uncertainty near services is a reason to stop and use a competent contractor. Also check local boundary and planning requirements before replacing a run, especially beside a highway. About 600 mm below ground is a common starting point for a typical panel fence, and one-third of the total post length is another rough rule. For a 1.8 m panel, roughly 1.8 m visible plus 0.6 m buried points to a post around 2.4 m long. The 1 m TG Supplies and 1.2 m Austin Commerce squares in this set fail that worked example. Do not make a shallower hole merely to rescue timber that is too short. Use the wood post buying guide to separate full posts from stakes and pegs. Ask for written confirmation that buried timber is Use Class 4. “Pressure treated”, “tanalised”, green colour and C24 do not state the same thing. If the required class is absent, resolve it before cutting or installing the post.

Dig the hole, add gravel and orient the post

Dig to the design depth and make the opening wide enough to place and compact the chosen backfill around the post. If the hole collapses, fills rapidly with water or reveals made ground, reassess the foundation rather than pouring concrete into an unknown void. Wood Protection Association installation guidance recommends a 150 mm layer of free-draining gravel below a treated post. Stand the post with its original uncut end down. A cross-cut end can expose a less thoroughly treated core, so it should not be placed at the wettest point. Plumb the post in both directions and brace it before adding the specified backfill or concrete. Do not try to solve hard or stony ground by repeatedly striking a flat-ended fence post with a sledgehammer. The WPA warns against hammering treated posts into hard ground because damage can split the timber and compromise treatment.

Use concrete without making a wet boot

Concrete should restrain the sides of the post, not form a sealed cup beneath it. Keep it off the bottom end so moisture can drain through the gravel. A concrete boot wrapping under the foot can hold water against end grain, exactly where timber is most vulnerable. Follow the concrete or rapid-setting product manufacturer’s mixing, placement and curing instructions. Shape the top surface to fall away from every side of the post. A slight slope prevents rain collecting at the timber–concrete junction. Fit gravel boards where the fence design uses them so the panel itself is held clear of damp ground.

Cuts, waste and when to call a professional

Avoid cutting a treated post where possible. If a cross-cut is unavoidable, make it at the top rather than burying it, and apply an approved end-grain preservative exactly as its label directs. That supplementary treatment helps protect the exposed cut, but it does not upgrade timber to UC4 or justify putting the cut end into the hole. Collect sawdust and offcuts rather than leaving them in beds or using them as firewood. Do not burn treated timber in a domestic stove, fireplace or garden fire. Follow your local council’s route for disposal. Stop and call a competent fencer when an existing run is leaning as a system, ground conditions are unstable, services cannot be located confidently or a gate imposes loads you have not designed for.

Common questions

How deep should a wooden fence post go?
About 600 mm is a common starting point for a typical panel fence, and one-third of the post length is another rule of thumb. Neither replaces a site-specific decision. Soft ground, exposed locations, tall panels and gates may need deeper or differently designed foundations, while buried services may constrain the position.
Which end of a treated post goes into the ground?
Put the original uncut treated end down. WPA guidance says not to bury a cross-cut end because cutting may expose a less thoroughly treated core at the wettest part of the installation. If trimming is unavoidable, cut the top and treat the exposed end grain with an approved product.
Should concrete go underneath the timber?
No concrete boot should cup the foot of the post. A recommended approach is approximately 150 mm of free-draining gravel beneath the timber, with concrete restraining the sides. Finish the concrete above ground with a slope away from the post so water does not collect at the junction.
Can a 1 m post support a 1.8 m panel?
Not with a normal buried foundation. If about 600 mm went into the ground, only around 400 mm would remain visible. A typical 1.8 m panel installation therefore points towards a post around 2.4 m long, subject to the ground, exposure and design.
What should I do if the ground is too hard?
Do not keep hammering a flat-ended treated post into hard ground. Dig or bore a suitable hole while checking for buried services, or use a competent contractor with appropriate equipment. Repeated heavy blows can split timber and damage its treated surfaces before the fence is even erected.
When should I hire a fencer?
Get professional help when you cannot establish service locations, the ground collapses or stays waterlogged, a whole fence run is moving, or a gate or exposed site needs structural judgement. Also stop if the proposed work affects retaining structures or a disputed boundary. Those conditions go beyond simply plumbing one replacement post.

Related pages

Sources

Public UK sources used for the use-class, planting and planning points on this page. Prices, stars and review counts are from the amazon.co.uk listings on 16 October 2026.

  1. Wood Protection Association — Understanding Use Class 4 (retrieved 16 October 2026)
  2. Wood Protection Association — Make sure it’s 4 (retrieved 16 October 2026)
  3. Timber Decking and Cladding Association — timber preservation (retrieved 16 October 2026)
  4. Wood Protection Association — installing treated fence posts (retrieved 16 October 2026)
  5. RHS — How to stake a tree (retrieved 16 October 2026)
  6. Planning Portal — fences, gates and garden walls (retrieved 16 October 2026)
  7. NetRegs — wood preservatives (retrieved 16 October 2026)
  8. HSE — creosote renewal bulletin (retrieved 16 October 2026)