Independent comparisons. We may earn from shop links. More info

How to set up a construction tripod

Updated: 23 October 2026

The first line you mark is only as still as the stand under it. If the column creeps after you lock it, every later mark moves with it. This is how to set up a construction tripod you already own: plant the feet, lock the legs, raise the column, then mount the tool and leave the head alone. The steps follow what the eight amazon.co.uk listings in our [construction tripod comparison](/hub/diy-supplies/construction-tripod) actually state. We did not run a lab set-up, and a qualifying purchase can earn us a commission at no extra cost to you. If you are still choosing a thread, start with the [construction tripod buying guide](/hub/diy-supplies/construction-tripod/sub/construction-tripod-buying-guide).

The first line you mark is only as still as the stand under it. If the column creeps after you lock it, every later mark moves with it.

Our top picks

On this page

Plant the feet before you touch the column

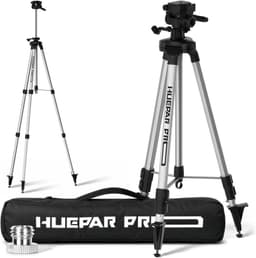
Spread the three legs on a surface that will not sink, with the head roughly over the middle, then set the foot to the floor. Rubber belongs on tile and finished concrete. Spikes belong in soft ground. The Huepar PT250 bullets describe feet you rotate from rubber to a metal spike, so you change them before the laser goes on. The Grettz listing describes a pole that locks to the ceiling and states no ceiling height, so measure the room and stop if the sections run out. Leave the column down until the feet have stopped moving.

Lock the legs, then the column

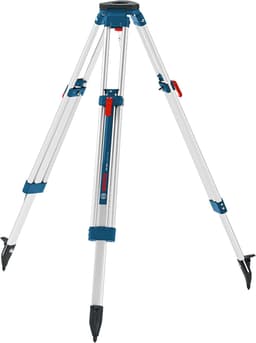
Open one lock at a time. Set that leg, close the lock, and move to the next. On the BT 150, UK reviewers describe leg clamps plus a centre crank. The listing does not say which way the crank turns, so follow the direction that raises the column and stop if it binds. Extend the column only as far as the job needs, then close the column lock. A gentle tug should not drop the section. If it still slips, take the tool off and stop. At work, where safety depends on installation, HSE guidance says you inspect after set-up under PUWER 1998.

Mount the tool and leave it alone

Seat the screw the instrument actually has. The BT 150 and BT 250 state 1/4 inch, the BT 160 states 5/8 inch, and both Huepar stands add a 5/8 inch adapter to a 1/4 inch plate. The Grettz page states no thread. Forcing the wrong screw strips it. Level from the laser’s own indication. Do not treat a copied weight field as a payload. The PT250 mentions a weight hook and includes no sandbag, so leave the hook empty. Switch the laser on only after the tug test. GOV.UK allows “eye-safe” for Class 1 only. The tripod does not change the class.

Site lamps, and when to stop

A lamp stand is a branch, not the default laser sequence. The SabreCut bullets allow one or two of its own work lights. The Maclean is sold without a lamp. Keep the floods inside the stated bar load, 8 kg on the SabreCut line and 10 kg claimed on the Maclean. Stop and call a professional for structural set-out, a Class 3B or Class 4 laser, temporary site electrics, or any use of the stand as a step. These tripods are not ladders. The laser choice is on the construction tripod for a laser level page, and the lamp bars are on the construction tripod for site lights page.

Common questions

What order do I set the legs and the column?
Spread the legs on a firm surface and set rubber or spikes to that floor first. Get the head roughly level by leg length, lock each leg, and only then extend and lock the column. Mount the matching thread after a gentle tug does not drop the section. If you raise the column while a leg lock is still open, the head walks as you tighten, and the first mark is already wrong. The column stays down until the stance has stopped moving.
How do I stop the head creeping after I lock it?
Close every leg lock and the column lock, then tug the head before the laser or the lamp goes on. If the section still slips, take the tool off and stop. Do not keep tightening a lock that has already failed, and do not treat a star rating as proof the column will hold. BT 250 reviews describe play at the head once a laser is fitted. A lock that holds a light laser can fail under a heavier instrument. That is a reason to stop, not a repair guide.
Do I push spikes into a tiled floor?
No. Spikes are for soft ground. Rubber is for tile and other finished floors. The PT250 is the listing that describes feet rotating from rubber to a metal spike, so you leave the rubber down indoors. Pushing spikes into a kitchen floor marks the tile and can still leave the head rocking if the points cannot bite. If your stand has only spikes, it is the wrong foot for that room. Set it outside, or use a stand with rubber on the finished floor.
What do I check before I leave a site lamp on the stand?
Check that each lock is closed, that the floods stay inside the stated load. On the SabreCut that load is 8 kg on the top bar, and the spec lines say 65–160 cm even where the title says 1.8 m. On the Maclean the claim is 10 kg, the lamp is not included, and the height is 62–150 cm. Confirm the screws are present, because reviews report missing fixings. The light should not change the colour of a safety sign.
When do I stop and call a professional?
Stop when the work is structural set-out, when the laser is Class 3B or Class 4, when the electrics are a temporary site supply, or when someone wants to use the stand as a step. Also stop when the column creeps after it is locked. A Class 2 laser on a stable stand is still your job if you keep the beam out of eyes. The tripod does not make it eye-safe. GOV.UK reserves that wording for Class 1.

Related pages

Sources

Public UK sources and the amazon.co.uk listings compared on this page. Updated 22.10.2026.

  1. Bosch Professional GB tripods (retrieved October 2026)
  2. Laser Levels Online: thread types (retrieved October 2026)
  3. Laser Level Review: tripods, rods and accessories (retrieved October 2026)
  4. Laser Levels Online: tripod shop table (retrieved October 2026)
  5. HSE: site lighting (retrieved October 2026)
  6. PUWER 1998 (retrieved October 2026)
  7. GOV.UK: General Product Safety Regulations 2005 (retrieved October 2026)
  8. GOV.UK: laser radiation safety advice (retrieved October 2026)