Independent comparisons. We may earn from shop links. More info

How to use a branding iron

Updated: 23 October 2026

The board is finished, the logo is the one you wanted, and a pale stripe or a black halo would wreck it. How to use a branding iron comes down to heat, a square press, and a scrap you are allowed to ruin. The steps below follow UK maker notes from Outpost Workshop and Bowers & Freeman, plus the seller times printed on the listings in our [branding stamp comparison](/hub/diy-supplies/branding-stamp). An amazon.co.uk link can earn us a commission if you buy, at no extra cost to you.

The board is finished, the logo is the one you wanted, and a pale stripe or a black halo would wreck it. How to use a branding iron comes down to heat, a square press, and a scrap you are allowed to ruin.

Our top picks

On this page

Set up before it is hot

Do the preparation while the head is cold. Cut a scrap of the same timber and the same face, because end grain drinks heat differently from a planed board. Brand bare timber. Oil, wax, and lacquer go on after the mark. Set the scrap and the piece on a stable bench. Give the iron somewhere to rest. LOVEVEN’s bullet says to preheat on the stand. A flame head has no stand in the Zopmopae specification, so you need a non-flammable rest before you light anything. If you are about to brand food, read branding iron for wood, leather, or food.

Heating a flame head

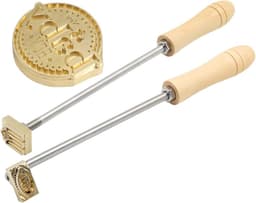
A flame head is hot only where the flame has been, and it cools as soon as you leave it. Outpost’s fire-heated guide uses a torch or a hob, a light mist on the wood, a test press, light pressure, and no more than about five seconds once the head is up to heat. That five seconds is a ceiling for a hot iron, not a count for a cold one. Seller bullets are shorter and should stay labelled as seller bullets. SWTHM says heat on grill coals, a gas grill, or a gas stove for 3–5 minutes, then press for about 3–5 seconds, and the kit is not for food. Zopmopae tells you to use a flame gun, charcoal, or a fireplace, and it gives no second count. If the flame will not hold a mark across more than a handful of boards, the limit is the heat source, on electric or flame branding iron.

Heating an electric iron

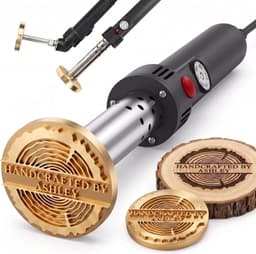
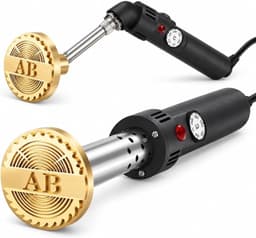
An electric iron removes the guess about whether the metal is hot, and it does not remove the scrap test. Outpost’s electric guide is a 240 V heater, about 5–20 minutes to heat, and a stand. A first run can smoke as oils burn off a new element. Do that on the stand, and do not read smoke as proof the head is ready. Ashley0921’s bullet says plug in, heat for 3–5 minutes, then press for 2–3 seconds. LOVEVEN says attach the brass head, preheat on the stand, press for 2–5 seconds, and lift straight up. Neither page states 230 V or a BS 1363 plug in the extract. If you have not chosen the iron, the order is in the branding iron buying guide. Unplug a corded iron when you stop.

Press, lift, and read the mark

Set the head down square. Light pressure is the advice from Bowers & Freeman and from Outpost. Rocking the handle prints the logo twice, a millimetre apart. Lift straight up. A drag smears the edge. A pale mark, with the lines incomplete, usually means the head was too cool or the contact was too short. A halo or a logo flooded into a block usually means too hot, too long, or both. On a flame head, reheat and shorten the press. If the torch is cooling mid-batch, change the tool rather than the technique.

Common questions

How long should the head heat before the first test?
Outpost allows about 5–20 minutes for an electric iron before you test. A flame head is ready when a scrap mark is even, which their fire guide treats as a test rather than a clock. Seller bullets are shorter: SWTHM and Ashley0921 both say about 3–5 minutes. Use the seller figure only as that listing’s instruction, then believe the scrap.
How long should it touch the wood?
Once the head is hot, Outpost says no more than about five seconds, with light pressure. Ashley0921’s bullet says 2–3 seconds. LOVEVEN’s bullet says 2–5 seconds. SWTHM’s bullet says about 3–5 seconds. None of those is a promise for every timber. Start at the short end of the range on scrap, and add time only if the lines are pale.
Should you wet the wood?
A light mist is an Outpost tip for wood, and the SWTHM bullet also says to spritz the area before you press. The water slows the surface scorch so the line can form instead of a halo. Do not soak the board, and do not mist leather or food because you saw the tip under a wood heading.
What does a pale mark mean, and what does a halo mean?
Pale and broken lines usually mean not enough heat or not enough time. A dark halo, a sunken patch, or a logo that has filled in usually means too much heat, too much time, or a head that moved. Change one of those and press the scrap again. Pressing harder does not turn a cool head into a hot one.
Do you brand before or after oil?
Before. Brand bare wood, then apply oil, wax, or lacquer once the mark has cooled. Finish already on the surface can bubble, and the brand stays faint because the iron is fighting the film. If the piece is already oiled, you are into a repair, not a first brand. Sand back to bare timber in the logo area, test on a matching scrap, and only then press the real face.

Related pages

Sources

Public UK sources and the amazon.co.uk listings compared on this page. Prices stored 19 October 2026. Updated 22 October 2026.

  1. Bowers & Freeman: branding irons (retrieved October 2026)
  2. Outpost Workshop: electric branding iron (retrieved October 2026)
  3. Outpost Workshop: fire-heated branding iron (retrieved October 2026)
  4. JH Machining: frequently asked questions (retrieved October 2026)
  5. GOV.UK: Electrical Equipment (Safety) Regulations 2016 (retrieved October 2026)
  6. Plugs and Sockets etc. (Safety) Regulations 1994 (retrieved October 2026)
  7. GOV.UK: Food contact materials regulations (retrieved October 2026)
  8. Retained Regulation (EC) 1935/2004, article 15 (retrieved October 2026)
  9. Consumer Rights Act 2015, section 9 (retrieved October 2026)
  10. Consumer Contracts Regulations 2013 (retrieved October 2026)
  11. OPSS product safety report 2312-0010 (retrieved October 2026)