How to use a Peltier element
You have a TEC1-12706 on the bench, or a 12 V cool box open on the kitchen table, and the leads are long enough to reach a battery before the heatsink is even out of the drawer. How to use a Peltier element starts with that minute, because the tile is easy to destroy as soon as current flows and the hot face has nowhere to send the heat. You should finish this page able to fit a thin film of paste, clamp the hot face, prove which face cools at low voltage, and switch off if the cold face warms. Prices sit in the [Peltier element comparison](/hub/electrical-equipment/peltier-element). We did not run the tiles ourselves.
You have a TEC1-12706 on the bench, or a 12 V cool box open on the kitchen table, and the leads are long enough to reach a battery before the heatsink is even out of the drawer.
You have a TEC1-12706 on the bench, or a 12 V cool box open on the kitchen table, and the leads are long enough to reach a battery before the heatsink is even out of the drawer. How to use a Peltier element starts with that minute, because the tile is easy to destroy as soon as current flows and the hot face has nowhere to send the heat. You should finish this page able to fit a thin film of paste, clamp the hot face, prove which face cools at low voltage, and switch off if the cold face warms. Prices sit in the Peltier element comparison. We did not run the tiles ourselves.
Our top picks
| Badge | Product | Paste in the box | Hot-side parts | Supply | Note | Price | Offer |
|---|---|---|---|---|---|---|---|
| Best overall |  diymore Diymore TEC1-12706 five-pack | No | None | 12 V DC | 8.8 | about £15.58 | View offer |
| Best value |  diymore Diymore TEC1-12706 two-pack | No | None | 12 V DC | 8.8 | about £7.99 | View offer |
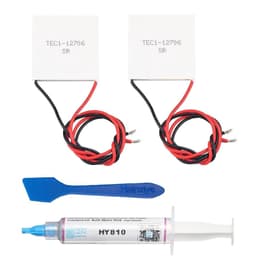
 diymore Diymore TEC1-12706 paste pair | Yes, 5 g HY810 | None | 12 V DC | 8.6 | about £8.99 | View offer |


On this page
Fit the hot side before you connect power
Paste, flatness, and even pressure
Prove which face is cold
Condensation and when to stop
Common questions
Which face goes on the heatsink?
Can I test without a sink for a second?
How much thermal paste should I use?
Can I run it from USB or from a car?
When do I stop and get an electrician?
Related pages
Sources
Public UK guides, the Consumer Rights Act 2015 and the datasheets below are the sources for the safety and wattage limits. Shelf prices and star lines are the amazon.co.uk figures in the captured listings, not a live re-scrape.
- GOV.UK: Electrical Equipment (Safety) Regulations 2016 (retrieved October 2026)
- GOV.UK: General Product Safety Regulations 2005 (retrieved October 2026)
- Consumer Rights Act 2015, section 11 (retrieved October 2026)
- Hebei TEC1-12706 datasheet (retrieved October 2026)
- Envistia TEC1-12706 user guide (retrieved October 2026)
- Envistia TEC1-12706 heatsink note (retrieved October 2026)
- Everredtronics TEC2 table (retrieved October 2026)
- Caframo Ecofan FAQ (retrieved October 2026)